Tuesday, August 31, 2010

Happy Birthday Miles Away


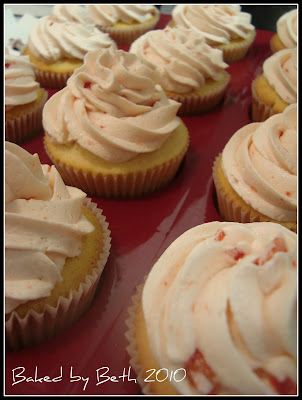
I made these cupcakes today, just because. I have a 3 1/2 year old literally bouncing off the walls..the floor..the ceiling and everything in between. Baking is calming to me, so I decided to see what I could make with what I had in my kitchen to get my mind of the disaster area that is my living room.

I had leftover Raspberry puree from one of the cakes I made for my friends' wedding reception a few weeks ago, (Kaytie and Arni's cake) so I decided to make vanilla cupcakes with raspberry filling and raspberry buttercream. Yum! They turned out great!

Someone very close to me (but who happens to be very far away right now) is celebrating their birthday this Friday. Unfortunately, they'll be celebrating alone...If I could get these cupcakes there and have them taste good, I'd do it in a heartbeat. So Happy Birthday..I'll be thinking of you, and enjoying your cupcakes!!

On another note, I found out about a cool Betty Crocker giveaway over at  one of my new favorite blogs, Family Fresh Cooking. She's giving away a goodie bag full of Betty Crocker baking utensils, as well as a cookbook. Who wouldn't like that? Check it out!

Vanilla Cupcakes adapted from The Novice Chef Blog

1 stick unsalted butter, at room temperature
2/3 cup sugar
3 large eggs
1 1/2 teaspoon vanilla extract
1 1/2 cups all purpose flour
1 1/2 teaspoon baking powder
1/4 teaspoon salt
1/4 cup milk

Preheat oven to 350 degrees. Place 12 cupcake liners in a muffin tin. In a large bowl, beat butter and sugar with electric mixer until light and fluffy (approximately 2 minutes.) Add eggs, one at a time, beating well after each egg is added. Add vanilla and mix well.

In another bowl, combine dry ingredients and whisk to combine. Add dry ingredients to wet in 3 batches, alternating with milk, beating well on low speed after each addition. Fill cupcake liners 2/3 full with batter, and bake for 17 minutes, or until toothpick inserted in the center of a cupcake comes out clean.

Remove from oven, and cool completely before filling and frosting.

Raspberry filling: ( this will make enough to fill a 3 layer cake, and then some. I froze the leftovers and used for both the filling and frosting for these cupcakes)
  
10 oz raspberries, fresh or frozen 
1/4 c. sugar 
1 tbsp cornstarch 
  
Rinse or defrost raspberries, and combine in blender with sugar and cornstarch. Blend until smooth. If seedless filling is desired, press through mesh strainer to remove seeds.


Raspberry Buttercream


1 stick butter, softened
2  cups powdered sugar
1 teaspoon vanilla extract
3 tablespoons raspberry filling


In a large bowl, beat butter with electric mixer until light and fluffy. Add 1 cup sugar, and beat on low until smooth. Add raspberry filling and vanilla, and beat until well combined. Add the rest of the sugar and beat until smooth. Add more sugar if you desire thicker frosting, or if you feel it needs to be thinned add a teaspoon of heavy cream or milk.


Happy Birthday!! 


Enjoy, and let me know what you think!

Monday, August 30, 2010

French Bread


I've loved all things French since I was in high school a few months several years ago. I was lucky enough to have the opportunity to travel to France twice during my high school years. I was blessed with a French teacher, Helen Bickell, who wanted her students to see more than just the insides of a classroom and a book. Mrs. Bickell wanted her students to experience the French culture, language and people for themselves- and she arranged trips for those of us that wanted that experience. Those two trips taught me so much, not only about all things French, but about myself as well. I'm forever grateful to Mrs. Bickell for giving me the opportunity of a lifetime...twice!

I've always been a picky eater, and as a teenager I wasn't open to experimenting with food the way I am now...So I ate quite a bit of french bread and cheese during those trips. At this point in my life, I could live on fresh baked french bread, brie and wine and die happy! Until a few weeks ago, I never thought about trying to make french bread at home. I saw this recipe on Brown Eyed Baker, and decided I'd give it a try. It seemed simple enough, and didn't require a truckload of ingredients..just a bit of time.

I've made this recipe twice so far. I'd say both attempts turned out ok, but I think I could improve my technique a bit and get better results. The bread from the first two attempts tasted pretty good but I had a bit of trouble forming baguettes the first time around, so the second time I made a Boule  I've read up on bread baking over at The Fresh Loaf, and have some new tricks I'd like to try. I'm going to make this again, and use a The Fresh Loaf's Preferment tip this time around and see how it goes.

French Bread from Brown Eyed Baker
Makes 2 baguettes or Boules

3 cups bread or unbleached flour
1 package dry yeast
1 1/4 cups hot water (120-130 degrees)
1 teaspoon salt
1 teaspoon warm water

Add 1 1/2-2 cups flour, hot water and yeast to a large bowl. Mix vigorously by hand or with an electric mixer. You should be able to mix with a mixer at this point without placing too much strain on the mixer. As the gluten begins to develop, the batter will become smooth and pull away from the sides of your bowl. The dough may start to climb your beaters- scrape it back down into the bowl with a spatula. Mix for 10 minutes. Dissolve the salt in the water, and add to dough. Mix for an additional 30 seconds.

If your mixer has a dough hook: place it on mixer and add the rest of the flour, 1/4 cup at a time until the dough forms and pulls away from the sides of the bowl.( Approximately 10 minutes)  If it is still sticky and clings to the bowl, add flour a few sprinkles at a time until it is no longer sticky.

If you're kneading by hand (like me): add the rest of the flour, 1/2 cup at a time stirring with a wooden spoon until it's too difficult to stir. At this point, begin working by hand. When the dough is a solid (slightly shaggy) mass, turn it onto your lightly floured work surface and knead by hand. Knead for approximately 10 minutes. An aggressive push-turn-fold method works best (and serves as stress relief!) If the dough remains sticky, add a few sprinkles of flour at a time. Occasionally throw your dough down onto the counter just because  its fun and sounds cool to encourage the dough to develop.

Place the dough in a large, greased bowl and cover with plastic wrap. Leave at room temperature for two hours.The second time I followed this recipe, I found that placing my dough in the warmer garage yielded a better rise. The dough will triple in volume and most likely be pushing against the plastic wrap when the time is up.

Turn the dough back out onto the lightly floured work surface, and knead again for approximately 3 minutes. Place back into the greased bowl, cover with wax or parchment paper, and return to previous rising location. Let rise for 90 minutes.

At this point, your dough should be light and airy. Turn back onto your work surface, and punch the dough down (ignoring your child as he tells you that it isn't nice to hit.) Divide your dough in half, and let rest for 5 minutes before shaping into desired shape.  For boules, shape dough into round balls. For baguettes, roll and lengthen until 16-20" long and 3-4" in diameter. Place dough on greased baking sheets, cover with a towel and let rise for approximately 1 hour. The dough will double in size and have formed a light crust.

Place a metal (not glass) pan on the bottom rack of your oven, and preheat to 450 degrees. Let oven sit at 450 for 20 minutes before placing dough inside. 5 minutes before baking, VERY carefully pour 1 cup water into the pan in the oven. Using a sharp knife, make diagonal slits on the top of baguettes, or tic-tac-toe designs on boules. Place baking sheet in the oven, and bake for 25 minutes. Remove from oven, and test loaf by turning over and tapping on the bottom. If the crust is hard, and has a hollow sound, the bread is done.

Cool loaves on a cooling rack, and enjoy!

Let me know what you think!

Saturday, August 28, 2010

Snickers Cupcakes

Snickers Cupcakes- Heaven in a cupcake wrapper

These heavenly creations were made for a bake sale that is being held at the hospital I work for. The American Heart Association's Heart Walk is coming up soon, and several of the different departments at the hospital have formed teams and are raising funds before the walk. For some reason, my department (The Cardiopulmonary department) doesn't have a team...which is sad. Had I known sooner, I'd have volunteered to start one up. I was asked to bake for the bake sale that the Cardiovascular Intensive Care and Stepdown units are having for their team, as I work up in CVICU quite a bit. The nurses up there have seen my blog and some of my other goodies, and knew I'd love to make something for the occasion.

I saw a recipe on The Novice Chef Blog for 100 Grand Cupcakes, and they looked amazing. I wasn't able to get my hands on the mini 100 Grand bars for the first batch, so I went for Snickers. The thing that excited me most about the recipe was the Salted Caramel Buttercream, and that works well with either candy bar.

Snickers Cupcakes adapted from 100 Grand Cupcakes at The Novice Chef Blog
 Makes 30 regular sized cupcakes
2 cups sugar
1-3/4 cups all-purpose flour
3/4 cup cocoa powder
1-1/2 teaspoons baking powder
1-1/2 teaspoons baking soda
1 teaspoon salt
2 eggs
1 cup milk
1/2 cup vegetable oil
2 teaspoons vanilla extract
1 cup boiling water

10 snack size Snickers bars, cut into thirds and frozen
3-4 snack size Snickers bars, chopped for topping

Preheat oven to 350°F and line muffin tins with cupcake wrappers.

Combine sugar, flour, cocoa, baking powder, baking soda and salt in large bowl and stir with wire whisk. Add eggs, milk, oil and vanilla  and mix with an electric mixer on medium speed for 2 minutes. Stir in boiling water (batter will be very runny).

Fill muffin tins 2/3 full with batter. Place in oven for about 8 minutes, remove trays and insert 1 candy piece into each cupcake. Place trays back in the oven for approximately 16 minutes.

Recipe Adapted from: Hersheys


Salted Caramel Buttercream Frosting
3 sticks unsalted butter; room temperature
3 teaspoons pure vanilla extract
1 1/2 pounds confectioners’ sugar
1/2- 2/3 cup caramel topping depending on taste; plus more for drizzling
1 1/2 teaspoon salt


Cream the butter in the bowl of an electric or stand mixer. Add the vanilla extract, salt and caramel syrup and combine well.

Add sugar in small batches, mixing well and scraping bowl after each addition. After all of the sugar has been added and mixed thoroughly, taste the frosting and add more caramel syrup if desired. For thicker frosting you can gradually add in a little more sugar.

Waiting for the finishing touches

Garnish with chopped  Snickers bars and a drizzle of caramel of caramel syrup.

The cooker boy (excuse the MJ glove)  with his cupcake..one happy camper!!


Enjoy..and let me know what you think!


Wednesday, August 25, 2010

Banana Bread


A sneaky little person (who shall remain nameless) got a bite before I could take my picture!

Banana bread always sounds good to me, but I never seem to get around to making it. I have a child who loves bananas, and they usually don't last more than a day or two when we bring them home from the store. I managed to hang on to a few this time around, and when they were starting to get spotted and soft...we made banana bread! I found a super quick recipe on The Fresh Loaf, which is a site dedicated to bread baking.


10 Minute Banana Bread from The Fresh Loaf

2-3 very ripe bananas
1/2 stick butter, softened
2 eggs
2/3 cup sugar
1 1/3 cup all purpose flour
3/4 teaspoon salt
1/2 teaspoon baking soda
1/4 teaspoon baking powder
1/2 teaspoon cinnamon
1/2 cup chopped pecans

Preheat oven to 350. Combine bananas, butter, eggs and sugar in a small bowl. Use a fork to mash ingredients and combine well. Small chunks of banana are fine, but I mashed mine so it was pretty unrecognizable.

In a larger bowl, whisk together the remaining dry ingredients. Add your banana mixture, and stir until well combined. Pour into greased loaf pan and bake for 45-50 minutes.

Cool in pan for 10 minutes or so, then turn loaf out of pan and enjoy.

Let me know what you think!!

Sunday, August 22, 2010

Cupcake Bites

Cupcake Bites (aka Beth's Blue Balls to my really mature awesome friends!) 

One of the first baking blogs I stumbled upon was Bakerella. Her site is AMAZING, and I've found great recipes, ideas and baking tips there. One of the coolest things Bakerella does is make bite sized treats- Cake Balls, Cake Pops, and Cupcake Bites. Me being the underestimating overachiever that I am, I skipped right to the more difficult Cupcake Bites...and I didn't take her suggestion to use a boxed cake mix and canned icing...no...I used two of her recipes and made them from scratch.

I used her Red Velvet Cake and Cream Cheese Frosting recipes. They turned out great..except i didn't have much red food coloring left, so mine turned out to be more like Pink Velvet cake. The frosting was great as well...and I only used about half of what I made in this recipe.

Putting the Cupcake Bitess together was the most time consuming part, full of trial and error. I made my cake balls too big the first time around, so then I tried to downsize a bit to get the right proportions.Trying to get the right amount of chocolate in the candy mold also took some trial and error, as did the dipping process for the cupcake "icing". I also discovered that 3 year old hands, while mighty cute, slow this process down ten fold!!

All in all, the cupcake bites turned out better than I imagined, and better than I expected when I started mixing them. The mixture looked like this:


Looks an awful lot like hamburger, doesn't it. A lovely thought when you're trying to make something sweet! The consistency also wierded me out a bit as I was rolling the balls, I couldn't imagine that they would be appetizing at all. I'm big on consistency and texture. Ask my family...the bunch of carnivores wonder why I don't care for red meat...it's all about the texture!


Meatballs anyone?? April fool's in August...these are the beginnings of my Cupcake Bites!! Like I said..not very appetizing at first! The picture taking stopped there, as Ben got involved..So here are the recipes and instructions. I'm glad I didn't follow my instinct at this point and pitch them, because they taste great!

Red Velvet Cake with Cream Cheese Frosting adapted from Bakerella

2 1/2 cups all purpose flour
2 cups sugar
1 Tablespoon cocoa
1 teaspoon salt
1 teaspoon baking soda
2 eggs
3/4 cups vegetable oil
1 cup buttermilk (or 1 cup milk mixed with 1 Tbsp vinegar, shaken well)
1 Tablespoon vinegar
1 teaspoon vanilla
2 oz. red food coloring

Preheat oven to 350 degrees. Grease and flour a 13" x 9" pan. Gently whisk the eggs in a medium sized bowl until just blended. Add the remaining wet ingredients, and stir until combined. In a larger bowl, whisk all dry ingredients until they are combined well. Add wet ingredients to dry, and mix on medium speed with an electric mixer until completely combined. Pour batter into pan and bake at 350 for about 40 minutes, or until the cake passes the toothpick test!

Let cake cool in pan for 20 minutes, then turn out onto cooling rack. I wrapped my cake in plastic wrap at this point, but I think it made the cake *too* moist for the rest of the process.

While the cake is cooling, make your frosting.

8 ounces cream cheese, softened
2 sticks butter, softened
1 tsp vanilla
4 cups sifted powdered sugar

Beat cream cheese and butter on high with electric mixer until light and fluffy. Add sugar, 1 cup at a time until well blended. Scrape the sides of your bowl often. Add vanilla and continue to beat until frosting is smooth.

Now for the assembly. I STRONGLY suggest (emphasis on STRONGLY) you look at Bakerella's page about the cupcake bites. Her pictures are much prettier than mine, and since this is her creation, she knows what she's talking about. I don't! This was my first attempt at these little creatures!

What you'll need for the cupcake bites:

1 13x9 cake, baked and cooled
1 recipe frosting ( or 1 can if you choose to go that route)
Chocolate chips or brown candy melts (for the bottom of your bites)
Colored Candy Melts (for the top of your bites)
Candy molds
Sprinkles, Jimmies, or whatever decorations you'd like

Ok, here we go.

  • Crumble the cake into a large bowl until light and fluffy

  • Mix with 1/2 the frosting if using the above recipe, or 1 can of packaged frosting

  • Use a large spoon to mix well..this part is a little tough..and it looks unappetizing

  • Roll mixture into quarter sized balls- just slightly smaller than the diameter of your candy molds

  • Pop into the freezer for a few minutes to harden, but don't freeze

  • Melt your chocolate chips or brown candy melts according to package directions

  • Fill your candy molds 1/3 full with melted chocolate

  • Press a cake ball into each mold, pressing until the chocolate begins to squeeze up around the edge
  • Place back into freezer just long enough for chocolate to set
  • Carefully remove each piece from the mold by pulling up on the cake ball
  • Melt your colored candy melts according to package directions
  • Dip each ball into melted candy, twisting to ensure the cake ball is covered
  • Top with sprinkles, jimmies etc. before candy hardens
  • Refrigerate until ready to eat
Enjoy..and if you have friends like mine, don't bring out Blue Cupcake Bites after large amounts of alcohol have been consumed..Inappropriate comments and photos will ensue..and as much as I love my friends and their comments and the pictures, I can't post them here!!


Sunday, August 15, 2010

Buckeyes+Cupcakes= Buckeye Cupcakes!

Go Bucks!! O-H-I-O!

Oh how I love chocolate..and peanut butter..and Buckeyes are the ultimate combination of the my two favorite substances! One of my good friends mentioned Buckeyes the other day, I think as a not-so-subtle hint that I should make some and bring them to work. So I thought about it. And this morning it dawned on me that I should not only make Buckeyes, but I should make cupcakes to put them on. So, I made both! All of my fellow Ohio State Buckeye fans will appreciate these! Go Bucks!

Chocolate Cupcakes with Peanut Butter Frosting

What you will need:

30 Chocolate Cupcakes
Peanut Butter Icing (recipe to follow)
30 Mini Buckeyes (recipe to follow)


The chocolate cake recipe I used is the same as in this post.  The only difference is that i used cupcake tins, filling the cups 2/3 full, and baked for 27 minutes. I think next time I'll use another cake recipe, as this one works well in layers but the cupcakes were a little too moist, and fell apart a little too easily when taken out of the paper liners. Live and learn!

The Peanut Butter Frosting I improvised..I love buttercream frostings, but I was feeling in the mood for a cream cheese frosting..so I used elements of both!

Peanut Butter Frosting
Enough to frost 30 cupcakes

1 package cream cheese, softened
1 stick unsalted butter, softened
2 Cups creamy peanut butter
1 Cup powdered sugar
2 tbsp vanilla
1/2 tsp salt

Mix cream cheese, butter and peanut butter with electric mixer till well blended. Add vanilla, and powdered sugar. Mix on medium speed until well combined.If necessary, add a tablespoon of milk to thin frosting. Increase mixer speed to high, and continue to mix until frosting is light and fluffy. Pipe or spread on cupcakes, and top with buckeyes.


Buckeyes
Adapted from Buckeye recipe at Allrecipes.com
30 mini and 20 regular sized Buckeyes

1 Cup creamy peanut butter
1 Stick unsalted butter, softened
3 Cups powdered sugar
1/8 tsp vanilla
3/4 package semisweet chocolate chips
1 Tbsp. shortening

Combine peanut butter, butter, powdered sugar and vanilla in bowl with electric mixer until combined well. Mixture will appear dry. Place bowl in refrigerator for 30 minutes.

When mixture is chilled, roll into 30 small balls and 20 large balls, and place on wax paper on a baking sheet. Stick a toothpick into the center of each ball. Place baking sheet into freezer for 15 minutes.

In glass bowl over a pan of simmering water, stir chocolate chips and shortening until melted and smooth.

Remove peanut butter balls from freezer. Using an ice cream scoop to hold a small amount of melted chocolate, dip peanut butter balls into chocolate until they are 3/4 of the way covered. Place back on wax paper. Repeat with each ball. When finished, remove toothpicks and place buckeyes in refrigerator for a few minutes until chocolate hardens. Top each cupcake with a mini buckeye, and try not to eat the remaining buckeyes in one sitting!

Enjoy and let me know what you think.


Tuesday, August 10, 2010

Awesome cakes for awesome friends! Part Three..


Putting the cakes together

I'm going to start off by saying up front that I really underestimated how much work would go into making two party-worthy cakes that would look even half as good as they would taste! In doing so, I had zero time to take pictures of the process, so I'll give you links to some blogs that made this process go 100 times smoother than if i just faked my way along  i used as resources- they have fantastic step by step photos for cake assembly and decorating!  I relied heavily on Smitten Kitchen's page of Cake Layer tips. I don't think I would have ever thought of most of these tips on my own. Like the wax paper strips to keep your cake boards clean...genius!

The assembly and decorating was the fun (albeit time consuming- 8 very long and  messy hours) part of this process. I made my cake layers a few days before the actual reception, and I used a flash freezing method to freeze them. I've never frozen cake before, and honestly, I think it made the cakes even better!

To flash freeze: Each layer needs to be in the freezer, unwrapped, for 30-45 minutes or until it is solid. I put the cakes in the freezer on the cooling racks still in the pans for about 15 minutes, then turned the layers out onto plastic wrap on the cooling rack and threw the whole rack back in the freezer for the 30-45 minutes. At that point, I wrapped each layer in 3 layers of plastic wrap, and placed them back in the freezer separated by cake boards.

When it came time to assemble and decorate my cakes, I made my fillings first so that they could chill if necessary while I was making the buttercream. The assembly part isn't difficult, but I did find another great tip that worked wonders to keep the filling out of the buttercream. Savory Sweet Life's How to Frost a Cake post, while it sounds obvious, was an absolute lifesaver! SSL's site will be much more helpful to you than mine will be!

Here's the short and sweet instruction list:
  •  Use a cake board with a  dollop of frosting in the center to hold your bottom layer in place.
  •  Place wax (or parchment) paper strips under the cake layer to protect your cake board.
  •  Unwrap the first frozen cake layer, and place it on the cake board.
  •  Level the cake with a serrated knife, if necessary. (This is SO easy with frozen cake!)
  •  Brush top of cake with a sugar water mixture. Bakerella clued me into this, and i think       this added another excellent dimension to my cakes.
  •  Pipe a 1/2 " dam of frosting around the top of the cake (check out the Savory Sweet Life page)
  •  Pour or spoon your filling into the dam, taking care not to spill over the edge.
  •  Unwrap second frozen layer, lightly placing on top of the first. Check placement from all sides- even though you used the same size pans, somehow the layers won't be uniform!
  • Trim if necessary (Yay for frozen layers!)
  • Push down on layer to make sure everything sticks together.
  • Repeat above steps with 3rd layer.
  • Once your cake is stacked, run an offset spatula around the edge- you'll have bits of your frosting dam that have squished out.
  • Crumbcoat with a light layer of your frosting- this helps keep the crumbs where they need to be, and you've got a smoother surface to work with for your final layer of frosting.
  • Refrigerate for 45 min- 1 hour to set frosting.
  • When you can touch the cake without frosting sticking to your finger, it's ready for the final coat of frosting.
  • Plop your frosting on top of the cake, and spread on top and down the sides. Add more if necessary. Smooth frosting around the sides with the offset spatula. Decorate any way that you'd like- I just played with the piping tips I had and improvised.
Here are the resources I used, again, for good measure. They're awesome- and have great pictures and more in depth instructions.


Bakerella's Sugar Water Spray ( The sugar water directions follow the yellow cake recipe)

Enjoy!


Monday, August 9, 2010

Awesome cakes for awesome friends! Part Two..


Vanilla Cake with Chocolate Ganache Filling and
Tiramisu Buttercream

Cake and Buttercream from Love and Olive Oil

(3) 8-inch cake pans used
Approximately 18 servings

3 3/4 cups cake flour (or 3 3/4 c all purpose flour, minus 1/2 teaspoon)
2 1/2 cups sugar
1 tablespoon plus 2 3/4 teaspoons baking powder
1/2 teaspoon salt
2 1/2 sticks (10 ounces) unsalted butter, at room temperature
1 1/4 cups plus 1/3 cup buttermilk
5 whole eggs
2 egg yolks

Preheat the oven to 300 degrees. Prepare your pans- I use Baker's Joy spray, and place a circle of parchment paper in the bottom of each pan to aid in removing the cakes later.

Combine dry ingredients in large bowl, whisking with wire whisk to make sure they're combined well. Add butter and 1 1/4 c buttermilk, mixing well on low speed with electric mixer. Increase mixer speed to medium, and beat 2-3 minutes and batter is light and fluffy.

In a second bowl, combine eggs, egg yolks, remaining buttermilk, and vanilla. Beat until well blended. Add liquid mixture to dry mixture  a little at a time, making sure the batter is mixed well after each addition.

Pour batter into pans, filling each pan approximately half full. Bake 28-30 minutes, or until toothpick inserted into center of cake comes out clean. Remove cakes from oven, and cool in pans on cooling rack. Once layers are cool, turn out of pans onto cooling rack and cool completely. Turning out of pans too soon will result in a broken layer. Trust me. Been there done that, twice!

Chocolate Ganache from Savory Sweet Life

8 oz semisweet chocolate chips
1 cup heavy cream

Heat cream over medium heat until it comes to a boil. Pour cream over chocolate chips in medium sized bowl. Let sit for a minute, then stir until chocolate is melted. Refrigerate for a 5 minutes to set. For this recipe, i wanted a pourable consistency for my filling, so I used it pretty quickly. For a spreadable consistency, refrigerate 30 minutes, removing from fridge often to stir and check consistency.

Tiramisu Buttercream

6 large egg whites
1 1/2 cups sugar

1 teaspoon pure vanilla extract
1 1/4 pounds (5 sticks) unsalted butter, softened
2 tablespoons warm water
1 tablespoon instant coffee

In a glass bowl sitting over a pan of gently boiling water, beat egg whites and sugar until hot to the touch and it resembles marshmallow creme. Remove from heat, beat on high speed until stiff peaks form.  Add butter and vanilla,  beating well until combined and light and fluffy. Dissolve instant coffee in water, and add 1 tbsp at a time until desired flavoring is reached.

I'll post instructions for cake assembly later.

Let me know what you think!


Sunday, August 8, 2010

Awesome cakes for awesome friends! Part One..


These are my awesome friends, Kaytie and Arni. Kaytie and Arni got married in Iceland (Arni's home country) a few weeks ago. Aren't they gorgeous?? Seriously, i think they moonlight as models!

While the wedding and reception were in Iceland, obviously not everyone could make the trip with them- so they held another reception last night, complete with the wedding dress and suit..like I said, absolutely gorgeous!

The food was great, pulled pork and ribs provided by Kaytie's dad..The man knows how to cook! Instead of having another wedding cake, a bunch of friends and family pitched in and provided a dessert buffet. This is where my cakes come in! I love to bake, I love my friends, I love to bake for my friends..so it was a no-brainer! I'd made an awesome (if i do say so myself) chocolate cake for Kaytie's birthday a while ago, so I offered to make it again (with some improvements and additions) along with another cake as well.

I made a Chocolate Cake with Raspberry Filling, Chocolate Ganache and Chocolate Buttercream topped with White Chocolate shavings, as well as a White Cake with  Chocolate Ganache Filling and Tiramisu Buttercream. I'll post one recipe today, and be back later with the other recipe as well as directions for assembling the cakes.

My contributions to the dessert buffet


Chocolate Cake with Raspberry Filling, Chocolate Ganache and Chocolate Buttercream


Cake and Raspberry filling
Adapted from Love and Olive Oil :

I made three (3) 8-inch layers, which provided about 18 servings.

3 ounces semisweet chocolate chips
1 1/2 cups hot brewed coffee
3 cups sugar
2 1/2 cups all-purpose flour
1 1/2 cups unsweetened cocoa powder (not Dutch process)
2 teaspoons baking soda
3/4 teaspoon baking powder
1 1/4 teaspoons salt
3 large eggs
3/4 cup vegetable oil
1 1/2 cups well-shaken buttermilk (or mix 1 1/2 cups milk with 1 tablespoon vinegar and let curdle)
3/4 teaspoon vanilla
 
Preheat oven to 300 degrees, and prepare your pans. I use Bakers Joy spray, and line the bottom of my pans with circles of parchment paper to ease in removing the cakes from the pans.
 
Pour the hot coffee over the chopped chocolate, and stir until chocolate is melted. I love this part, and I don't drink coffee!
 
Combine dry ingredients in a large bowl, and stir with wire whisk to assure they're combined.
 
In a second large bowl, beat eggs with mixer until they're thickened a bit, and have a nice light yellow color. Add the buttermilk, chocolate-coffee mixture, oil and vanilla slowly and beat until combined. Slowly add dry ingredients while beating on medium speed. Continue to beat until combined.
 
Divide the batter between your prepared pans- if using 8 inch pans, they'll be about half full.
 
Bake for approximately 35-40 minutes, or until a toothpick inserted into the center of the cake comes out clean. Remove from oven, and place pans on cooling rack. Once cool, turn cakes out of pans onto cooling racks, remove parchment paper and cool completely. Attempting to turn them out too soon results in a broken layer..Another lesson learned the hard way!!
 
Raspberry filling:
 
10 oz raspberries, fresh or frozen
1/4 c. sugar
1 tbsp cornstarch
 
Rinse or defrost raspberries, and combine in blender with sugar and cornstarch. Blend until smooth. If seedless filling is desired, press through mesh strainer to remove seeds. I leave the seeds in my filling.
I made a boo-boo and forgot to heat my filling, so it wasn't thick..but it still tasted great and worked well in the cake. If you're good at reading directions, like I very obviously am not, then go ahead and heat your filling over medium heat until it boils. Stir constantly. This, you direction followers, thickens the filling!!
 
 
Chocolate Ganache
From Savory Sweet Life
 
12 oz semisweet chocolate
1 1/2 cups heavy cream
 
Heat cream over medium high heat until it begins to boil. Immediately pour over chocolate chips in a medium sized bowl. Let sit for a minute or two, then stir until smooth. For a spreadable consistency, refrigerate for approximately 30 minutes, removing from fridge occasionally to stir and check consistency.
 
Chocolate Buttercream
Adapted from Savory Sweet Life
 
2 cups (4 sticks) unsalted butter, at room temperature
6 cups powdered sugar
1 tsp salt
1/2 tbsp vanilla
4 tbsp heavy cream
1/8 cup cocoa powder
 
Beat butter with mixer until creamy. Add powdered sugar, a little at a time (again to avoid the massive white sugar cloud in the kitchen..no contact highs for my little guy..Sorry Ben!) until combined. Add vanilla, cream, cocoa powder and salt, and beat on medium speed until frosting is nice and fluffy. If you want a thicker consistency, add more powdered sugar. If you prefer thinner frosting, add more cream.
 
Enjoy, and let me know what you think!!
 
Beth


Tuesday, August 3, 2010

The Cooker Boy wants Strawberry Cupcakes

The cooker boy's Strawberry Cupcakes

Ben ( aka The Cooker Boy) has been hounding me to make cupcakes lately, so I gave in last night. I asked him what kind of cupcakes he wanted, and the answer was Strawberry with pink icing, because pink is a color for boys and girls. Can't argue that, there are grown men wearing pink, and I don't want to give the kid a complex.

I compromised, and tried a new yellow cake recipe and improvised my way to Strawberry Buttercream. We were both happy with this decision! I wasn't so sure if adding strawberries to the buttercream would work well or not, but the result was a nice Pink frosting (yay Ben) with nice bits of strawberry and an amazing flavor! The cake was lacking something, possibly from the ommission of butter flavoring and the fact that i substituted cream for the milk. Like i said, I improvise. A lot. With what I have on hand. Overall, I was pleased with how the cupcakes turned out...Here you go!


Moist Yellow Cake  from Bakerella

1 cup (2 sticks) butter, room temperature
2 cups sugar
4 eggs, room temperature
3 cups sifted self rising flour
1 cup whole milk
1 teaspoon pure vanilla extract
1/2 teaspoon butter flavoring

Preheat oven to 350 degrees. Grease and flour 3 8-inch cake pans, or use cupcake tins if desired.
Using a mixer, cream butter until fluffy. Add sugar, and continue to cream for about 7 minutes. Add eggs one at a time, mixing thoroughly after each egg. Add flour and milk to creamed mixture, starting and ending with flour. Add vanilla and butter flavoring until just mixed.

Divide batter between pans, or cupcake tins. For the 8 in cakes, bake 25-30 minutes. For my cupcakes, 18 minutes worked well.  Cool in pan 5-10 minutes.

Remove cakes from pans, and immediately wrap in plastic wrap to seal in moisture. Cool completely on wire racks. ( Didn't do this...wrapping 30 cupcakes seemed like a pain..but next time will try with cakes, I'm interested to see how this turns out)

Strawberry Buttercream Frosting  adapted from  Savory Sweet Life

1 cup butter ( 2 sticks), softened
3 cups powdered sugar, sifted
1/2 teaspoon salt
1 tablespoon vanilla extract
2 tablespoons milk or heavy cream
handful of strawberries, washed, hulled and pureed

Beat butter with mixer until creamy. Add powdered sugar a little at a time to prevent the massive white cloud of sugar in your kitchen. Once the sugar and butter are mixed and creamy, add
 salt, vanilla and milk/cream until just mixed. If the frosting isn't at your desired consistency, add more sugar to thicken or more milk/cream to thin. When you've got your desired consistency, fold in strawberries gently.

Here's the Cooker Boy enjoying his treat, after licking all the frosting off the cupcake...


Enjoy!! Let me know what you think..

Monday, August 2, 2010

The first post...here we go!

So at work yesterday, one of the nurses asks "Do you like to cook? Because when you're not busy, you're always looking at food..". It's true. On the rare occasion I'm not busy at work, I love reading food blogs! I've gotten some great ideas, amazing recipes, and lots of inspiration from other food bloggers. So I've decided to start my own blog! I cook to blow off steam, when I'm bored, when I'm getting together with friends, or when my son wants to make something. I love trying out new recipes, putting my own little spin on them and seeing what happens!

So the first recipe.. is...


Strawberry Cupcakes with Lime Buttercream
adapted from Strawberry-Lime Stuffed Cupcakes at Foodnetwork.com


This is a small recipe, it will make either 6 large or 10 regular size cupcakes.

1 1/2 cups all-purpose flour
1 1/2 teaspoons baking powder
1/4 teaspoon fine salt
2 large eggs, room temperature
2/3 cup sugar
3/4 cup unsalted butter, melted
2 teaspoons pure vanilla extract
1/2 cup milk

Preheat the oven to 350 degrees F. Line the muffin tin with cupcake liners.

Whisk the flour, baking powder, and salt together in a medium bowl.

In another medium bowl, beat the eggs and sugar with an electric mixer until light and foamy, about 2 minutes. While beating, gradually pour in the butter and then the vanilla.

While mixing slowly, add half the dry ingredients, then add all the milk, and follow with the rest of the dry ingredients. Take care not to over mix the batter. Divide the batter evenly in the prepared tins.

Bake until a tester inserted in the center of the cakes comes out clean, about 30 minutes. Cool cupcakes on a rack in the tin for 10 minutes, then remove. Cool on the rack completely.

My variation came in here. I didn't nestle a strawberry inside the cupcake like the original recipe calls for, and I made my icing a buttercream....because I love buttercream!

1 stick unsalted butter, softened
2 cups confectioners sugar
juice of 2 limes
Green food coloring if desired

Mix butter and sugar until creamy, add lime juice and mix until blended. Add food coloring if desired.

I sliced the strawberries and put them on top of the cupcakes, along with some lime zest and green sanding sugar.

Enjoy! Would love to hear what you think!