Thursday, September 30, 2010

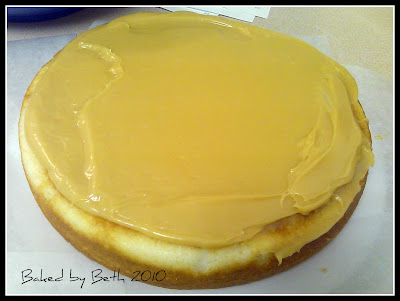
Dulce de Leche Cheesecake Brownies


I had a very interesting weekend at work. It ranged from moments of sheer boredom to what could have been moments of sheer panic if such a luxury was afforded in my profession. When someone else's newborn baby's life rests in your hands, there is no time for panic. You do what you've been trained to do, breathing for a baby that isn't breathing on it's own...while barely remembering to breathe for yourself. When it's all said and done, you go home on an adrenaline high...and barely sleep that night, reliving that experience over and over again.

I've said it before..I bake to clear my head. I definitely needed a clear head after my experience in Birth Care over the weekend. I'd attempted a new brownie recipe last week that didn't turn out right. I wanted to try brownies again, but I'd also seen a recipe for Dulce de Leche Cheesecake bars that looked good. I decided to take elements of both and make up a new recipe. Brownies, a layer of Dulce de Leche Cheesecake, a layer of Dulce de Leche, and a chocolate glaze. I wasn't sure if this would turn out or not, but it did...perfectly. The brownies are exactly what I envisioned-rich, creamy and decadent. The process of deciding how to put this recipe together and then making each of the elements definitely cleared my head and left me relaxed, just as I hoped it would.

I adapted elements from a few different sources to come up with these Brownies. The Brownie itself is from David Lebovitz via Cake or Death. The Cheesecake and Chocolate glaze come from Becky Bakes. The Dulce de Leche is from The Perfect Pantry. I only take responsibility for having a sweet tooth and wanting all of these goodies in one!

Dulce de Leche Cheesecake Brownies

First, the brownies.
8 tbsp unsalted butter, cut into pieces
6 ounces semisweet chocolate
1/2 cup unsweetened cocoa powder
3 large eggs
1 cup sugar
1 teaspoon vanilla extract
1 cup flour

Line an 8'x8' square pan by criss-crossing two sheets of foil to leave foil hanging over the sides of the pan. Grease the foil with butter or non-stick spray.

Melt butter in a medium saucepan over low heat. Add chocolate, stirring constantly until the chocolate melts. Remove from heat and add cocoa powder, whisking until smooth. Add the eggs one at a time, whisking well after each addition. Add sugar, vanilla, and flour, whisking until smooth. Pour into prepared pan and set aside.

Now, my favorite part, the Dulce de Leche

I use the microwave version of Dulce de Leche. It's the only method I've ever used to make it, but I've had good results and it's fast. 

(2) 14 oz cans of Sweetened Condensed Milk

Pour contents into a large glass bowl, cover with plastic wrap with a little bit left uncovered to vent steam. Microwave for 2 minutes on 50% power. Remove from microwave and stir with wire whisk. Repeat for another 2 minutes at 50% power, remove and stir. Continue to microwave for 10-12 1/2 minutes, now in 2 1/2 minute increments, stirring after each. The milk will start to bubble up as it heats, and will darken in color. When the color and consistency look right to you, stop microwaving. It's that easy. Set aside and let cool, covering bowl when completely cool.

Next, the cheesecake...

1 teaspoon unflavored gelatin
1/4 cup milk
8 oz cream cheese, softened
2 large eggs
3/8 teaspoon salt
1 cup dulce de leche * recipe follows


Pour milk into a small bowl, sprinkle gelatin over the top and let stand until it softens.


Beat cream cheese, eggs, salt and gelatin mixture together in a medium bowl using electric mixer on medium speed. Beat until smooth, then gently stir in dulce de leche.


Pour over brownie batter, and bake for approximately 50-55 minutes at 350 degrees.

Remove from oven when cheesecake is lightly browned, and a toothpick inserted in the center comes out mostly clean.

Immediately top with one cup of dulce de leche, cover with foil, and place back in the oven for a few minutes to soften the dulce de leche and make it spreadable without destroying the cheesecake layer. Remove from oven, and spread dulce de leche to cover cheesecake. Let cool.


Finally, the glaze.

3 ounces semisweet chocolate
1/2 stick butter
2 teaspoons light corn syrup

Melt butter in a small saucepan over low heat. Add chocolate and corn syrup, and stir until chocolate is melted. Pour immediately over the brownies, and tilt pan to spread.

Refrigerate uncovered for 30 minutes to set glaze. Then, cover and refrigerate until serving.

Enjoy, and let me know what you think!

Tuesday, September 28, 2010

Homemade Cinnamon Rolls


I am not a morning person. Never have been, never will be. On the days that I work, I have to get up at 5:30 am...and it's a struggle. Somehow, The Cooker Boy is an early riser- he thinks 6 am is sleeping in! The Cooker Boy loves "Brefffast Rolls" as he calls them..I call them cinnamon rolls. He woke me up at the crack of dawn We woke up early on my last weekend off, and I decided to use that time to try out the Pioneer Woman's Cinnamon Roll recipe I'd looked at a thousand hundred few times. This recipe is surprisingly easy, the hardest part is rolling the dough to the right thickness to end up with rolls and not lumps, like my first batch did. Regardless of what shape they turned out to be, they tasted great! I don't think I'll ever buy canned cinnamon rolls again! (Sorry, Pillsbury!)

I made a few changes to the original recipe for a few reasons. I have no need for 7 pans of cinnamon rolls, so I cut the recipe in half. The other changes were swapping ingredients I had in the house for ingredients the recipe called for. I encourage you to visit The Pioneer Woman's website and view her recipe- the step by step photos she has are amazingly helpful!

The Pioneer Woman's Cinnamon Rolls adapted from The Pioneer Woman Cooks
Makes 3 pans of rolls

2 cups milk
1/2 cup vegetable oil
1/2 cup sugar
1 packet active dry yeast
4 cups plus 1/2 cup flour, separated
1/2 teaspoon (heaping) baking powder
1/2 teaspoon (scant) baking soda
1/2 tablespoon salt
2 sticks butter, melted (more if desired)
1 cup sugar
Generous amount of cinnamon- as much or as little as you please

Combine milk, vegetable oil, and sugar in a large pot. Heat over medium-high heat until just before it boils (Scalding). Turn off the heat and let sit until lukewarm- 45 to 60 minutes. Sprinkle yeast over the mixture, and let sit for a minute.  Add 4 cups of flour and stir until combined. Cover and let rise for at least an hour.

After rising, add the remaining flour, baking powder, baking soda and salt. Stir until combined. Dough can be refrigerated at this point if you want to make the rolls later, but I like instant gratification. I made my rolls right away.

Take half of the dough and roll out into a thin rectangle on a lightly floured surface. Be careful not to roll the dough too thin..this makes for cinnamon lumps instead of rolls.

Drizzle 1/4-1/2 cup melted butter over the dough, then sprinkle 1/2 cup of sugar and desired amount of cinnamon over top. I thought I was going heavy with the cinnamon, but the taste was barely noticeable. Next time, I'm going all out.

Now comes the tricky part. Starting at the edge that is away from you, roll the dough in a neat line towards you. Keep the roll as tight as you can. Pinch the seam of the roll to seal it.

Spread 1 tablespoon of butter in a cake or pie pan. Using a very sharp knife, cut the rolls 3/4"-1 inch thick, and lay in the buttered pan.**


Repeat this process with the other half of the dough. Let the rolls rise for an additional 20-30 minutes before baking for 20 minutes at 350 degrees.

** With my first batch looking like lumps, I decided to use my muffin tin instead of a cake pan. I drizzled a bit of melted butter into each tin, and sprinkled a bit of cinnamon and sugar on top. I placed a chunk of dough into each tin, and topped with more butter, cinnamon and sugar as most of the "goo" leaked out during the rolling process. These tasted just as great as the rolls!


While the rolls are baking, prepare your glaze. The original Maple frosting sounds sinful, but I had neither maple flavoring or coffee in my house. We all know I have a thing for salted caramel, so I improvised and came up with the following delicious glaze.

Salted Caramel Glaze

8 oz powdered sugar
1/4 cup milk
1/8 cup melted butter
1/2 cup caramel (store bought, or homemade- recipe follows)
1/2 teaspoon salt (if using the caramel recipe below, omit additional salt)


Whisk sugar, milk and butter together in a medium bowl. When combined, stir in caramel and salt. Pour over rolls immediately as they come out of the oven, and tilt the pan to spread the love!

I can't tell if he's supervising, or wants to dive into the rolls!
Sea Salt Caramel from Doughmesstic

1/2 cup heavy cream
1 teaspoon sea salt
1 cup sugar
2 tablespoons light corn syrup
1 teaspoon vanilla
1/4 cup sour cream

Combine cream and salt in a small saucepan and heat over low until salt is dissolved. Set aside.

In a medium saucepan, add sugar and corn syrup. They will not combine well until the sugar starts to melt.
If you have a candy thermometer, cook over high until mixture reaches 350 degrees. If your child thinks the thermometer is a toy (like mine does), cook until the mixture is a light amber color. Remove from heat- the mixture will continue cooking, and the color will darken to a nice caramel color. ( I cooked it to the caramel color the first time, and while it looked great, the caramel had a very bitter taste..I burnt it. Thanks to Susan @doughmesstic for your help!)

Stir in the cream mixture and vanilla, then whisk in sour cream. Let the caramel cool to room temperature, and transfer to an airtight container to refrigerate.

Enjoy, and let me know what you think!!

Wednesday, September 22, 2010

Lemon Triumph Cake


One of the items on my 'To-Bake' list was a Lemon Triumph Cake I spotted over on Willow Bird Baking.  The recipe seemed challenging, as there were several components to make. Making cake and buttercream isn't new to me, but I'd never made a Lemon Curd or Mousse before! I decided I'd put the recipe on my 'To-Bake' list and give it a try when I had a reason to make another cake.

While I was at work last Saturday, I got a text from one of my good friends asking if I was working Sunday. I was, and I asked why...come to find out, she was offering to pay me to bake a cake for a party at her husbands office on Monday. She told me to forget it since I had to work, that she'd make something, but it wouldn't taste as good as something I could make. Awww...Well, as it turned out the cake wasn't needed until Tuesday, so I was able to make it. When I asked what kind of cake her husband wanted, she said vanilla and lemon. Perfect excuse to make the Lemon Triumph Cake!

This is a time-consuming recipe. I am a natural born procrastinator. My argument for my procrastination is that it forces me to come up with something great the first time around! If you're smart, you'll do like Julie on Willow Bird Baking suggests and make this cake in stages. If you're like me, you'll do it in one morning, running errands while each element is cooling or setting up!

I altered the recipe a bit- I prefer white cake with lemon flavored icing or filling, so I used my standby white cake recipe. I did use the Lemon Curd and Mousse recipes straight from WBB. The icing was my own lemon buttercream.

All in all, I think I could have decorated the cake a little better, but from what I hear it tasted fantastic! Can't wait to try it again and have a bite myself.

Lemon Triumph Cake adapted from Willow Bird Baking


Lemon Curd:
6 tablespoons unsalted butter, softened
1 cup sugar
2 large eggs
2 large egg yolks (save the whites for later)
2/3 cup fresh lemon juice
1 teaspoon fresh lemon zest.

Using an electric mixer, beat butter and sugar in a large bowl for about 2 minutes. Add eggs and yolks, one at a time, beating well after each addition. Beat for about a minute after the last egg is added. Add lemon juice and mix well. The mixture will appear curdled- this will disappear when heated.

Transfer the mixture to a heavy saucepan and cook on low heat until smooth. Increase the heat to medium and cook, stirring constantly, until the mixture thickens and reaches 170 degrees on a candy thermometer. Don't let this mixture boil! Remove from heat, and stir in lemon zest. Transfer to a small bowl, and place a layer of plastic wrap directly on the surface of the curd- this will prevent a skin from forming. Place in refrigerator- curd will thicken as it cools.

White Cake adapted from Sporkorfoon, who adapted it from Cook's Illustrated

2 1/4 cups cake flour
1 3/4 cups granulated sugar
4 teaspoons baking powder
1 teaspoon table salt
1 cup milk (original calls for whole, I used 2%)
3/4 cup egg whites (6 large or 8 medium)
1 teaspoon vanilla
12 tablespoons unsalted butter, softened but still cool

Preheat oven to 350 degrees. Prepare pans- will make 2 9-inch layers. Mix dry ingredients in large bowl with a wire whisk, and set aside. Pour milk, egg whites and vanilla into a smaller bowl and whisk until combined. Add butter to dry ingredients, and mix with electric mixer on medium speed until mixture resembles crumbs. Add all but 1/4 cup of milk mixture, and beat on high speed with hand mixer (medium if you're a bigshot with a stand mixer) for 1 1/2 minutes. Scrape down sides of the bowl, add the remaining milk, and beat for an additional 30 seconds.

Pour into pans or prepared muffin tins, filling 2/3 of the way full. Bake cakes at 350 for 23-25 minutes. Remove from oven, and let cool in pans on wire rack for 15-20 minutes. Put pans in freezer for 15 minutes, then turn cakes out of pans and wrap each layer in 3 layers of plastic wrap to help lock in moisture. Place back in freezer until ready to use.

Lemon Mousse:
1 recipe lemon curd (above)
2.5 tablespoons water
2 teaspoons unflavored gelatin
3 large egg whites
3/8 cup sugar
3/4 cup chilled heavy whipping cream

Place water in small saucepan and sprinkle gelatin evenly over the surface. Let sit until gelatin softens. Place 7/8 cup of the curd into a large bowl and set aside. In another small saucepan, heat the remaining curd over medium-low heat until very warm.

Turn the burner for the gelatin mixture to medium-low, and stir until gelatin dissolves and liquid is clear, being careful not to let it boil. Whisk warm gelatin into the warm curd, then whisk the warm curd into the bowl of cold curd that has been waiting oh-so-patiently.

In a medium bowl, beat egg whites with electric mixer until soft peaks form. Slowly add sugar, continuing to beat until egg whites are thick and glossy. Gently fold this mixture into the curd in 3 additions. Using the same beaters, beat the cream until peaks form. Gently fold this into the curd as well, making sure mixture is smooth. Place mousse into refrigerator until slightly, but not completely, set.

This recipe made twice as much mousse as I needed for my cake...but it's just as great on its own as it is in a cake! I also used it as a cupcake filling a few days later, with the same cake and buttercream because I wanted a taste of this cake for myself! Yum!!

According to my mom, they're my best cupcakes yet!

Back to the cake...Remove one frozen cake layer from the freezer, unwrap, and place on a cake board. Top with a generous layer of mousse, spreading to the edges of the cake. Place this layer back in the fridge until mousse is set, then top with second cake layer.


Lemon Buttercream
3 sticks unsalted butter, softened
6 cups powdered sugar
3-4 teaspoons lemon extract
Milk or heavy cream to thin
2 drops yellow gel food coloring

Cream butter in bowl using electric mixer. Add sugar in small batches, adding milk or cream a tablespoon at a time to achieve desired consistency. Add food coloring if desired, and lemon extract.

Use a small amount of icing to crumb coat your cake, and place back in the fridge for 10-15 minutes until icing is set. Frost with remaining icing. I reserved a bit to decorate with, and added a drop or two of yellow food coloring to get a darker frosting for some contrast. Use your imagination! I also topped with fresh raspberries, but you could use any fruit, or none at all.


Enjoy, and let me know what you think!

Tuesday, September 14, 2010

Dulce de Leche Cake


One word. Yum!


I got a call from a friend, the day before Labor Day that went something like this:


Friend: "Want to come over tomorrow for a BBQ?"
Me: "Sure!!"
Friend: "Can you bring dessert?"
Me: "Sure...should have known that was coming!"


So I'd been drooling over a Dulce de Leche cake recipe on one of my new favorite blogs, Spork or Foon, and decided this would be the perfect opportunity to make it. I love trying out big fancy cake recipes on my friends! They loved it..I loved it..Ben loved it so much it ended up on our kitchen floor the day after the BBQ. I was devestated! I'd do just about anything for another bite of that cake..it was the perfect combination of fluffy white cake, creamy dulce de leche filling, and rich caramel buttercream icing.


I used the recipe straight from Spork or Foon, but it was adapted it from several different sources. I'll include those links with each component of the recipe.


Dulce de Leche Cake with Caramel Buttercream Frosting
from SporkorFoon


White Layer Cake adapted from Cook's Illustrated


2 1/4 cups cake flour
1 3/4 cups granulated sugar
4 teaspoons baking powder
1 teaspoon table salt
1 cup milk (original calls for whole, I used 2%)
3/4 cup egg whites (6 large or 8 medium)
1 teaspoon vanilla
12 tablespoons unsalted butter, softened but still cool


Preheat oven to 350 degrees. Prepare (2) 9 inch pans, covering the bottom of each pan with a circle of parchment paper and spraying with nonstick spray. Mix dry ingredients in large bowl with a wire whisk, and set aside. Pour milk, egg whites and vanilla into a smaller bowl and whisk until combined. Add butter to dry ingredients, and mix with electric mixer on medium speed until mixture resembles crumbs. Add all but 1/4 cup of milk mixture, and beat on high speed with hand mixer (medium if you're a bigshot with a stand mixer) for 1 1/2 minutes. Scrape down sides of the bowl, add the remaining milk, and beat for an additional 30 seconds.

Pour batter into pans, filling 2/3 of the way full. Bake cakes at 350 degrees for 23-25 minutes, or until a toothpick inserted into the center of the cake comes out clean. Remove from oven, and cool in pans on wire racks for 20 minutes. Turn layers out of pans onto a baking sheet lined with plastic wrap, and place in freezer for 30 minutes.

Remove from freezer, and wrap each cake in 3 layers of plastic wrap, and place back in freezer until ready to use.


Dulce de Leche Filling from The Perfect Pantry

1 14 oz can of sweetened condensed milk

Pour contents of can into large glass bowl, and cover with plastic wrap. Turn back a little of the plastic wrap on one side of the bowl to vent excess steam. 

Microwave on 50% power for 2 minutes, remove from microwave and stir with wire whisk. Recover with plastic wrap, and microwave for an additional 2 minutes on 50% power. Stir again, and recover.

In 2 1/2 minute intervals, continue microwaving for 7 1/2-10 minutes. Remove after each 2 1/2 minute interval and stir well. Mixture will bubble up and become thicker and more caramel colored with each stirring. 

The original recipe calls for using the full 10 minutes. I did that the first time around, and my milk was cooked too much. The second time around, I stopped at 7 1/2 minutes and had a perfect Dulce de Leche. Since microwaves vary, stop when you feel the consistency and color are right!

The finished product:
Perfect, and delicious! I could eat this straight out of the bowl!

Caramel Buttercream Frosting from Paula Deen via the Food Network

Do not make this frosting until you are ready to use it immediately. It dries very quickly! 

1 stick butter, softened
1 cup packed brown sugar (original recipe calls for dark, I used light)
1/3 cup heavy cream
1 tablespoon vanilla extract
16 ounces powdered sugar

Melt butter in small saucepan over medium-low heat. Add brown sugar and cream. Continue cooking until sugar is melted, stirring constantly. Remove from heat and stir in vanilla. Pour into large mixing bowl. Add powdered sugar in small batches while mixing on low speed with electric mixer. Mix until smooth. If frosting is too thick, add 1 tablespoon heavy cream to thin. 

Cake Assembly:

Remove first layer from freezer, unwrap, and place on cake board. Level with serrated knife if necessary. Spread a thick layer of Dulce de Leche filling on top of this layer.


Top with second cake layer, and press down. If you have filling squishing out between the layers, run an offset spatula around the edge to smooth. Apply a thin layer of Caramel Buttercream Frosting as a crumb coat, and place the cake in the fridge for 15 minutes to set. This layer of frosting doesn't have to be perfect, or even pretty...It's just there to trap any loose crumbs and keep them from getting stuck in your final layer of frosting!


Set aside frosting for piping, if desired. Use the remaining Caramel Buttercream to frost the top and sides of the cake. Since this frosting dries so quickly, I found it useful to use a heated offset spatula to smooth out the frosting. Run your spatula under hot water, dry, and smooth. Repeat until cake is smooth and pretty! Pipe decorations on top and around the bottom of cake, if desired. I topped mine with a drizzle of caramel, piped chocolate hearts, and a drizzle of melted chocolate. Do whatever makes you happy!


All of the components of this cake are wonderful! Together, they make my favorite cake to date! I've also used the white cake in a few other recipes as well- its light and moist and perfect with any combination of fillings and frostings.

Enjoy, and let me know what you think!!

Sunday, September 12, 2010

Hope and Encouragement

This post isn't food related, but if I was able to send a cake or cupcakes successfully with the card this post is about, I certainly would have!

I took part in a giveaway hosted by (in)courage, a division of Dayspring cards meant to serve as means of spreading hope and encouragement to the special women in our lives. I read a post on the (in)courage website offering a package of 10 hope and encouragement cards for simply agreeing to send a card and blog about the recipient or the situation. Easy enough! I love Dayspring cards, so this was a no brainer. I love sending unexpected cards in this day of e-everything!

I received the cards the other day, and I love them all! The graphics are colorful, the wording is sweet and compassionate, and the most of the cards are 3 dimensional- with textures, cutouts, or both! I can't wait to use them all up.


The recipient I chose for the card to blog about, Debbie, has been a part of my life since I was in 7 years old. She came into my life as my piano teacher of 13 years, but over time we became friends, and now we are more like family. I was a shy, somewhat withdrawn child, and related better to adults than to kids my own age, and Debbie recognized something in me that I didn't see in myself until much later in life. As far as Hope and Encouragement go, Debbie has always been one of the people I'll call or email  if I feel like I need to be uplifted.

We're separated by distance now, but Debbie is always in my heart and on my mind. When I was home for a visit in June, she gently reminded me that not everyone uses social networking sites as much as I do.  I've always loved the process of finding *just* the right card, and sending it as an unexpected surprise. When I saw this card, I thought of Debbie, and the promise I made to be better about staying in touch!


"Once in a while, a friend comes a long who changes things. She makes your heart more thankful, your laughter a little easier, and your life that much sweeter."


"There's a joy in friendship only God can give- and you've shown me how wonderful that can be."

So, Debbie, if you happen to read this, I hope you how much I love you, and how important you've been to me for such a long time now. I also hope this card brightened your day, and lets you know that even though you don't use Facebook, you're still on my mind! I am always looking forward to my next visit home- and our next girls night out!

Thank you, (in)courage, for the opportunity to use your cards to express my gratitude for such wonderful friendship and for the opportunity to share this story!

I'm going to use this as an opportunity to host my first giveaway!

I recieved 10 cards, and want to share 5 with you to thank you for reading my blog. All you need to do to enter is leave me a comment telling me who you'd send a card of Hope and Encouragement to and why.

Entries must be recieved by midnight, EST, Monday, September 13. I'll use Random.org to determine a winner, and will post the results on Tuesday. Please be sure to leave your name and email address- I'll email the winner on Tuesday, and if I don't recieve a response by Friday I'll pick a new winner.

Good Luck!

Friday, September 10, 2010

Quick Sugar Fix! White Cupcakes with Lemon Buttercream


I've been off work for almost two weeks, spending my days home with my 3 1/2 year old son. I love him beyond words, but being a single parent to an incredibly smart and active boy with ADHD can be exhausting.  Especially when said child thinks he can thrive on 6 hours of sleep a night! The last few days have been especially trying- for both of us I'm sure- I'm ready to go back to work, and I'm sure he's ready to go back to "school".

I was feeling slightly overwhelmingly grumpy yesterday afternoon, and took advantage of the fact that when I sent Ben into his room to clean up the disaster area, he passed out on his bean bag.

The only time he's ever used the bean bag, other than to climb on...and the mess is still there! Argh!


I was craving something sweet, but not too heavy. I decided to remake the cake portion of a recipe I made over the weekend, except as cupcakes..and with a Lemon Buttercream frosting instead of the super rich caramel frosting that was on the Dulce de Leche cake I made for the Labor Day BBQ I went to. (I'll post that cake as soon as my lovely friend Kaytie sends me the pics...my cell pics don't do that cake justice!)

This is my new favorite white cake recipe! It's light, moist, bakes evenly....it's lovely! It worked well in the Dulce de Leche cake, and worked just as well for these cupcakes. I baked 12, froze the rest of the batter, and wrapped 6 of the cupcakes up and stuck them in the freezer as well for the next time I need a quick fix!

White Cake adapted from Sporkorfoon, who adapted it from Cook's Illustrated


2 1/4 cups cake flour
1 3/4 cups granulated sugar
4 teaspoons baking powder
1 teaspoon table salt
1 cup milk (original calls for whole, I used 2%)
3/4 cup egg whites (6 large or 8 medium)
1 teaspoon vanilla
12 tablespoons unsalted butter, softened but still cool


Preheat oven to 350 degrees. Prepare pans- will make 2 9-inch layers, or approximately 30 regular sized cupcakes. Mix dry ingredients in large bowl with a wire whisk, and set aside. Pour milk, eggwhites and vanilla into a smaller bowl and whisk until combined. Add butter to dry ingredients, and mix with electric mixer on medium speed until mixture resembles crumbs. Add all but 1/4 cup of milk mixture, and beat on high speed with hand mixer (medium if you're a bigshot with a stand mixer) for 1 1/2 minutes. Scrape down sides of the bowl, add the remaining milk, and beat for an additional 30 seconds.

Pour into pans or prepared muffin tins, filling 2/3 of the way full. Bake cakes at 350 for 23-25 minutes, cupcakes for 18 minutes.

Lemon Buttercream Icing (didn't follow a recipe, just threw together a few things and was lucky that it turned out well!)

**I was only icing 6 cupcakes, so increase measurements accordingly for larger batches**

1/2 stick unsalted butter, softened
2 cups powdered sugar
1 teaspoon lemon extract
2-3 tablespoons of milk
2 drops yellow gel food coloring

Cream butter in bowl using electric mixer. Add sugar in small batches, adding milk a tablespoon at a time to achieve desired consistency. Add food coloring if desired, and lemon extract. Decorate however you see fit at the time- for me, it was colored sanding sugar!!

Enjoy!

Sunday, September 5, 2010

Cheesy Bacon and Scallion Quiche


First of all, please excuse the horrible picture quality...a little pair of hands happens to love my camera, so much so that it's broken..and on it's way in for repair (THANK YOU Target for your extended warranty!!).

Secondly, Yes, most of my posts are sweet items..But, I need you to know that I don't live solely on cake and cupcakes (as much as I'd like to!)

I had some bacon and scallions that needed to be used up, and I didn't think they'd go with cupcakes well..So I decided to make quiche for lunch yesterday. I LOVE quiche. With a passion...I think this goes back to my love of all things french! This was my first attempt at making quiche, and my first attempt at making a crust from scratch. Both turned out fantastic..and were still yummy reheated for breakfast today!

First,  the crust...

Cheesy Quiche Crust from Allrecipes.com

3/4 cup all purpose flour
6 tablespoons cold butter, cut into small pieces
1/4 cup shredded cheddar cheese
5 teaspoons cold water

Place flour and butter in large bowl, and work with your hands until combined well to resemble bread crumbs.
Work in the grated cheese, and sprinkle with a little bit of water and continue to work with your hands until the dough forms a ball. I didn't find it necessary to use much water at all, in fact after the first teaspoon I added more flour because the dough was too wet. Wrap ball of dough in plastic wrap, and place in fridge for at least 30 minutes.

Remove dough from fridge, and roll out into a circle to fit your pan. I found that this wasn't quite enough dough for my pie plate- I didn't have pretty edges, but it still tasted fantastic!

The original recipe says to preheat oven to 375 and bake crust for 9 minutes before filling. I skipped this step (I don't follow directions well, remember?) I filled my crust while it was raw, and it turned out just fine.


Now the filling...

Cheesy Bacon and Scallion Quiche adapted from About.com: Southern Food

1 prepared crust from above recipe
6 slices bacon, cooked until crisp and crumbled
4 eggs
1 cup heavy cream
1/2 cup milk
1/4 teaspoon thyme
1/4 teaspoon freshly ground black pepper
1 cup shredded cheddar cheese
1/4 cup shredded pepper jack cheese
2 scallions, sliced, green part only

Preheat oven to 375. Prepare crust as above, or use a store bought crust (but I promise the cheesy crust is worth the little bit of effort it takes to make!) Whisk eggs in a bowl, add cream and milk and whisk until combined. Stir in thyme and pepper, and pour into crust. Sprinkle bacon, scallions and cheese into egg mixture. Bake for about 30 minutes, or until quiche is lightly browned and just slightly jiggly. Remove from oven, and let rest a few minutes before serving. Attempt to not eat the whole quiche in one sitting...yes, it's that good!

Enjoy!

Saturday, September 4, 2010

Cupcake Decorating: Hydrangeas


I saw a tweet last week about Hydrangea cupcakes, and I had to check it out. Hydrangeas are one of my favorite flowers, especially the bi-colored variations! I read the post over on Glorious Treats, and I was surprised at how simple this technique really is! I couldn't wait to try it. When I made my Raspberry Filled Cupcakes with Raspberry Buttercream earlier in the week, I saved a few so I could try this technique out for myself. I set aside some of my buttercream before I added the raspberry puree so I could try the bi-color look using pink and white frosting. Not too shabby for the first time around! Definitely check out the post on Glorious Treats, she gives a great tutorial on how to pull this off.

I'll definitely try this again!

Enjoy!!